Fancy Bookmarks

So, let’s continue on our quest to making small handmade gifts that are capable of bringing a smile on the faces of the recipients.

I am starting with fairly simple projects suitable for beginners. They give you ample chance to play with your sewing machine and use its many features in innovative ways. And the fun with working on these small projects is that, they do not take a lot of time, and if you mess up, you can make modifications or start all over again.

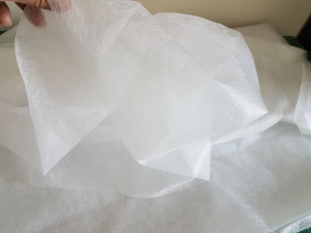
For the bookmarks, I rummaged through my pile of scraps (if you do not have too many of them, ask your tailor to return your cuttings from that favourite dress you asked him to make) and got out some nice and colourful ones.
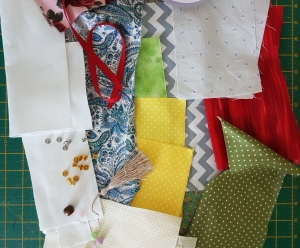
 

20180304_130610.jpg

My scraps

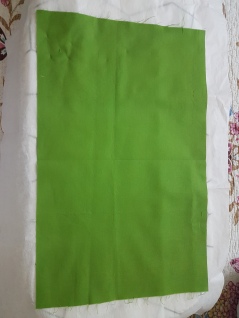
Apart from the scraps, you also need, some pieces of thin stiff batting, or stiff felt. Beads, tassels and ribbons work as great additions.

I made all of mine at 7″x 1.5″, but you can choose to do any shape or size you like. There is no prescribed shape or dimensions, so let your imagination fly.

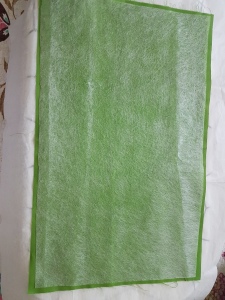
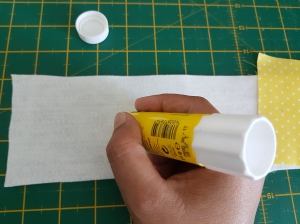
To start off, baste some of your fabric pieces to the batting using basting spray, or if you don’t have one of those, the humble school glue stick works just as well. Just spread a thin layer on the wrong side of the fabric and smoothen out the two layers.

20180304_131205.jpg

And now, the fun begins, play with the decorative stitches on your machine, add a funky quote if you have the monogramming option,applique, hand embroider, paint, or use a fabric marker to write your favourite saying. I even used up some bits of vintage hand embroidery.

MY SECRET: I always try out whatever I am doing on a scrap before adding it to my project. Saves me the trouble of picking up the seam ripper every time.

20180304_133651.jpg

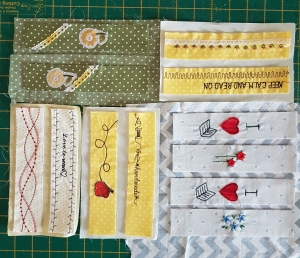
When I was done playing around with all the scraps that I had sorted, this was what I came up with:

20180304_173904.jpg

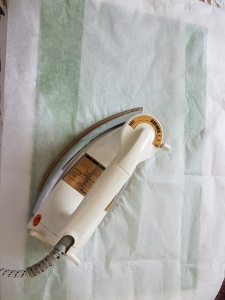
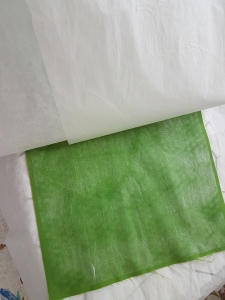
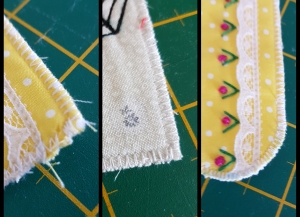
And then, with the wrong side of the lining fabric facing up, I basted them on to my completed pieces as before. And trimmed them down to the size I was looking for.

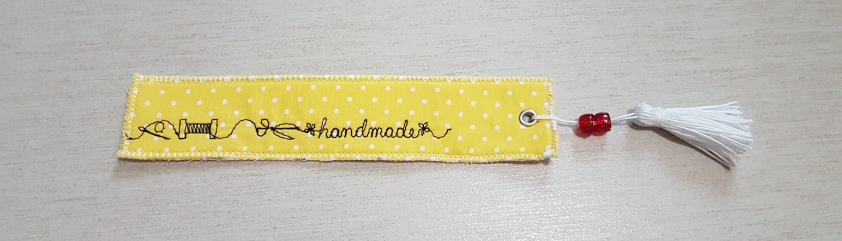
Now, to finish up the edges, I set my machine on a zigzag (satin) stitch, and fixed the stitch length at 1 mm and the stitch width at 4 mm. Then I went around the edge of each bookmark in such a way that the needle fell on the fabric on one side and just outside the edge of the fabric on the other.

Turning corners may be a bit tricky, but it works when you get a hang of it. And as I said before, don’t worry if you spoiled that first one; you could either discard it, or like me, just change the shape and make it curvy. New design…ta da!!

20180305_135529.jpg

The messed up, the neat and the curvy one!

Voila!! Your pretty bookmarks are ready!!

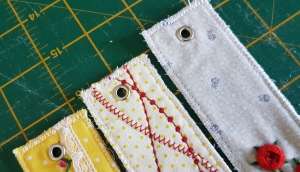
Unless, you want to play some more. In which case, you can add eyelets (lots of YouTube videos on that one), and decorate with ribbons, beads, tassels…

20180306_101658.jpg

Mine look like this, after I had spent the morning playing with them…

20180306_114827.jpg

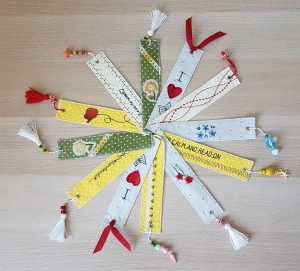
Aren’t they cute!! The girls are already laying claims on them!

They make lovely teacher gifts with the school years coming to an end pretty soon, or personalize that book you bought for your bookworm friend’s birthday, or sell them at the school spring fair.

Follow my blog for more of these fun projects, and share it with your friends too. Send me a picture if you decide to make some of them.

That’s me signing off for now. Catch up with you soon with another fun project…


Snappy Eyeglasses Case

Hi folks, I am back with another simple project to help inspire the creative genius in you.

Online media is full of tutorials for snappy pouches, each one a reflection of the creativity of it’s maker. Well, with so much inspiration all around, who isn’t tempted? And so, here is my adaptation of the snappy pouch, which is big enough for your sun glasses, and the rotary cutter fits snugly in it too. My youngest claimed the last one I made for her pencils.

For this project, you need:

  • Piece of fabric, 16″x 4.5″ from top fabric and 20″x 4.5″ from lining.
  • Piece of thin batting 16″x 4,5″
  • 0.5″ wide metallic tape measure 3.75″ long (2 pieces)
  • Small piece of fabric 1″x 2″ for tab (optional)
  • Electrical tape
20180209_135659.jpg

What you need

Place your top fabric on the batting with the right side facing up, and flatten it well. then lay it out on the lining fabric such that about 2″ of lining fabric pops out on either side. you can mark the center by finger pressing or with pins. Then fold the lining fabric over twice at about 1″ to make a double crease over the top fabric and batting.

20180209_141243.jpg

Press it down, sew over the edge using a straight or decorative stitch. This is also the time to add a lace, if you so fancy.

20180209_143507.jpg


Now is the time to prepare your tape measure insert. Round off the sharp edges of the tape measure carefully using a spare scissors that is not to be used for fabric. Then cover both ends with layers of electrical tape.

20180209_140636.jpg

Round off edges and prepare tape measure pieces


Fold over your eyeglass case along the long edge, and line up the top edge. Sew along one side using a quarter inch seam. Now, slip the pieces of tape measure into the channel at the top, such that the concave side faces the main fabric side. And push it well into the channel. Then, align and sew along the other open side.


Use a small round object to round off the bottom edge, sew along the curved corners and smoother all raw edges using your rotary cutter or a pair of scissors. Then sew with a zigzag stitch to seal the raw edge.


Turn inside out pushing the seams out using a blunt nosed pair of scissors or a chop stick.


And voilĂ ! Your eyeglasses case is ready.

And this is so addictive, you will not stop at one. I went ahead and made a whole bunch, in all shapes and sizes. including one with embroidery on it.

20180209_112647-1.jpg

So go ahead, enjoy your brand new project, and please let me know how it worked for you.


My First Post

I am the mother of three grown up kids, crazy about all things needle and thread, and this is my very first blog post.

Let me tell you something about myself, before we move on to the more important business of teaching and learning. I have been a sewing crazy person since early childhood. I learned to sew, and crochet when I was around 8-10 years old, from my mum and aunts.

As I grew older, my parents decided that being an intelligent child, I should study science (that was the norm in those days). I went on to do a masters in botany. Thereafter, I got married, had children and went on with the flow of life . But, all this time, the sewing machine was never far from my side. I sewed for the kids, and for my home.

Now that the kids are grown and getting into their own, I decided to indulge myself more into my life’s passion. In my subsequent posts, I will be posting tutorials for simple handmade gifts.

Applying Fusible Web to Fabric

But today, for starters, I would like to show you how to attach a fusible web to a fabric. This is a relatively simple procedure and will come in handy when we move on to making small projects, or decide to do raw edge applique on some of them. Lots of high tech peel-off fusibles are available in the market, that are easy to use, but may cost you a fortune.

20180221_115234.jpg

This humble fusible web is available by the meter in haberdashery stores, and is easy to apply. So you start off by taking a piece of parchment/baking paper, big enough to cover your ironing board. Lay your fabric on the parchment, with the wrong side facing up (you may use a fat quarter or a fat eighth because once you’ve done this, you can keep on using pieces from it for as long as you need them).

20180221_115021.jpg

Cut a piece of fusible web, a quarter of an inch short of your fabric, and lay it on the fabric. Cover this with another piece of parchment paper.

20180221_115503.jpg

20180221_115632.jpg

Turn your iron to high heat and dry setting, and press down on the fabric firmly and steadily, until all of your fabric is pressed.

20180221_115730.jpg

Leave it to cool. This may take some time. Please do NOT try to peel off the parchment from the fabric while it’s hot. You may ruin it.

After it has cooled down completely, remove the parchment paper from the top and bottom, and your fabric is ready to be used.

20180221_121545.jpg

In my next post, I’ll be posting instructions for some cool bookmarks, that make excellent teacher gifts or a cute little addition to that bookworm friend’s birthday gift.

That’s me signing off for now. Please write to me to let me know how you liked my post, and what kind of projects you would like to make in future.